Spring boot, Firebase Authentication을 이용한 로그인 처리
spring boot에 firebase authentication을 연동하여 계정 인증 및 로그인 처리
Firebase를 사용하면 별도의 서버 환경과 코드 없이 구글, 애플, 깃허브 등 여러 제공 업체에 대하여 인증 처리하고 사용자를 관리 할 수 있다
일반적인 id, password 방식과 Google 로그인 방식을 사용 하여 로그인 하는 예제이다
예제에 사용된 전체 소스 코드는 하단의 Repository 링크를 참고하면 된다
Firebase project
firebase project 생성
로그인 처리를 하기 위해서 Firebase project를 생성 한다
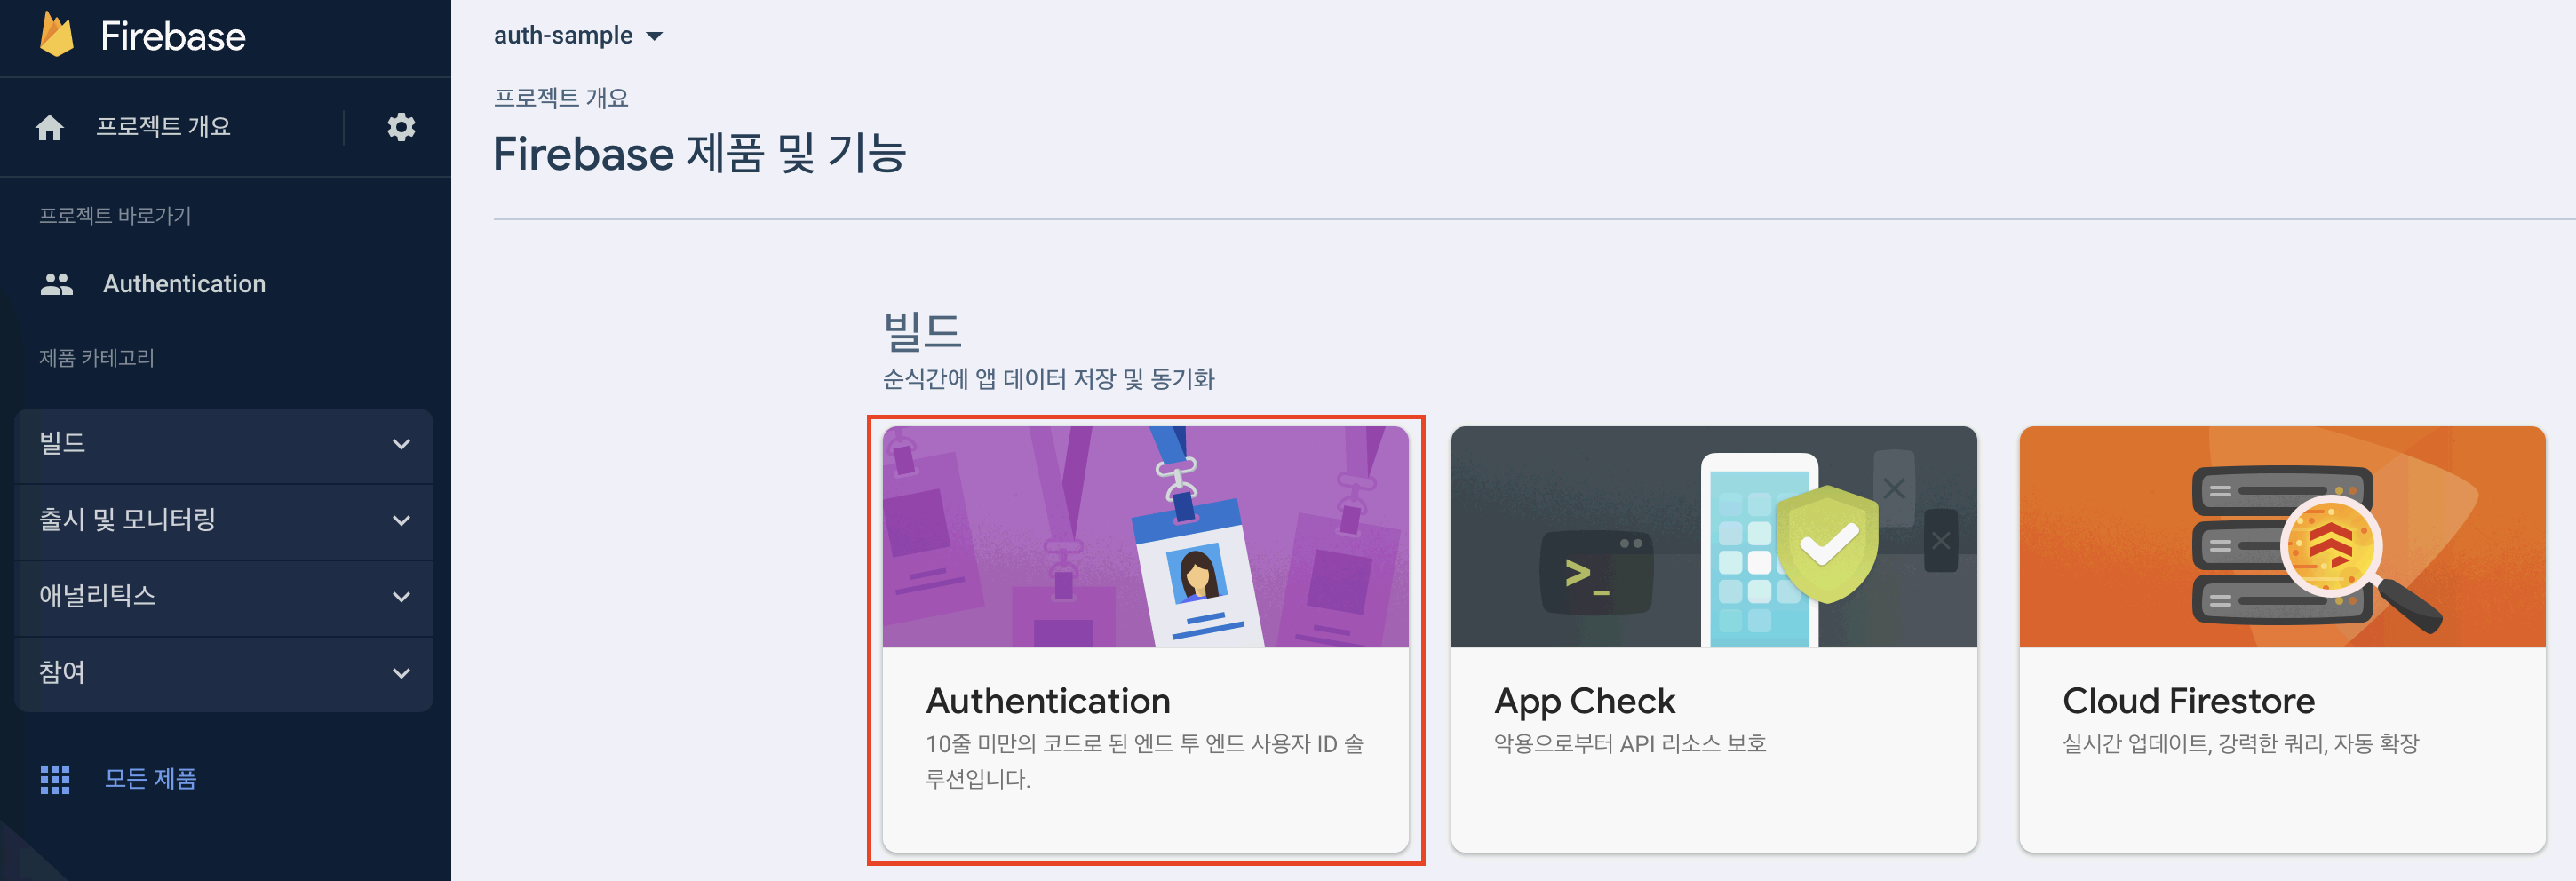
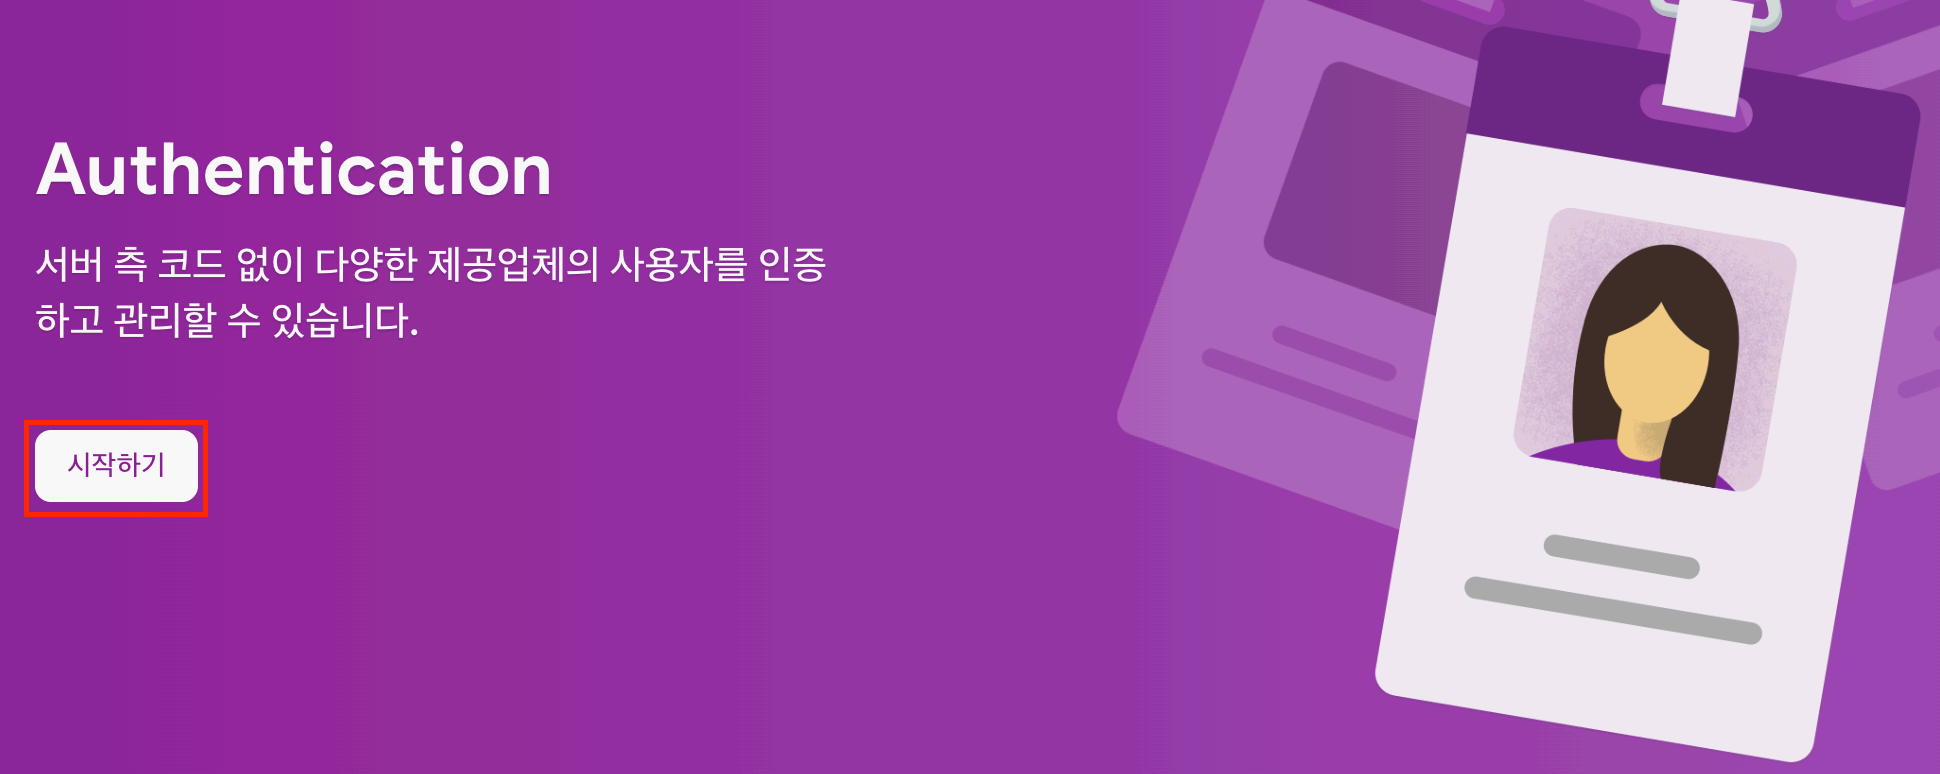
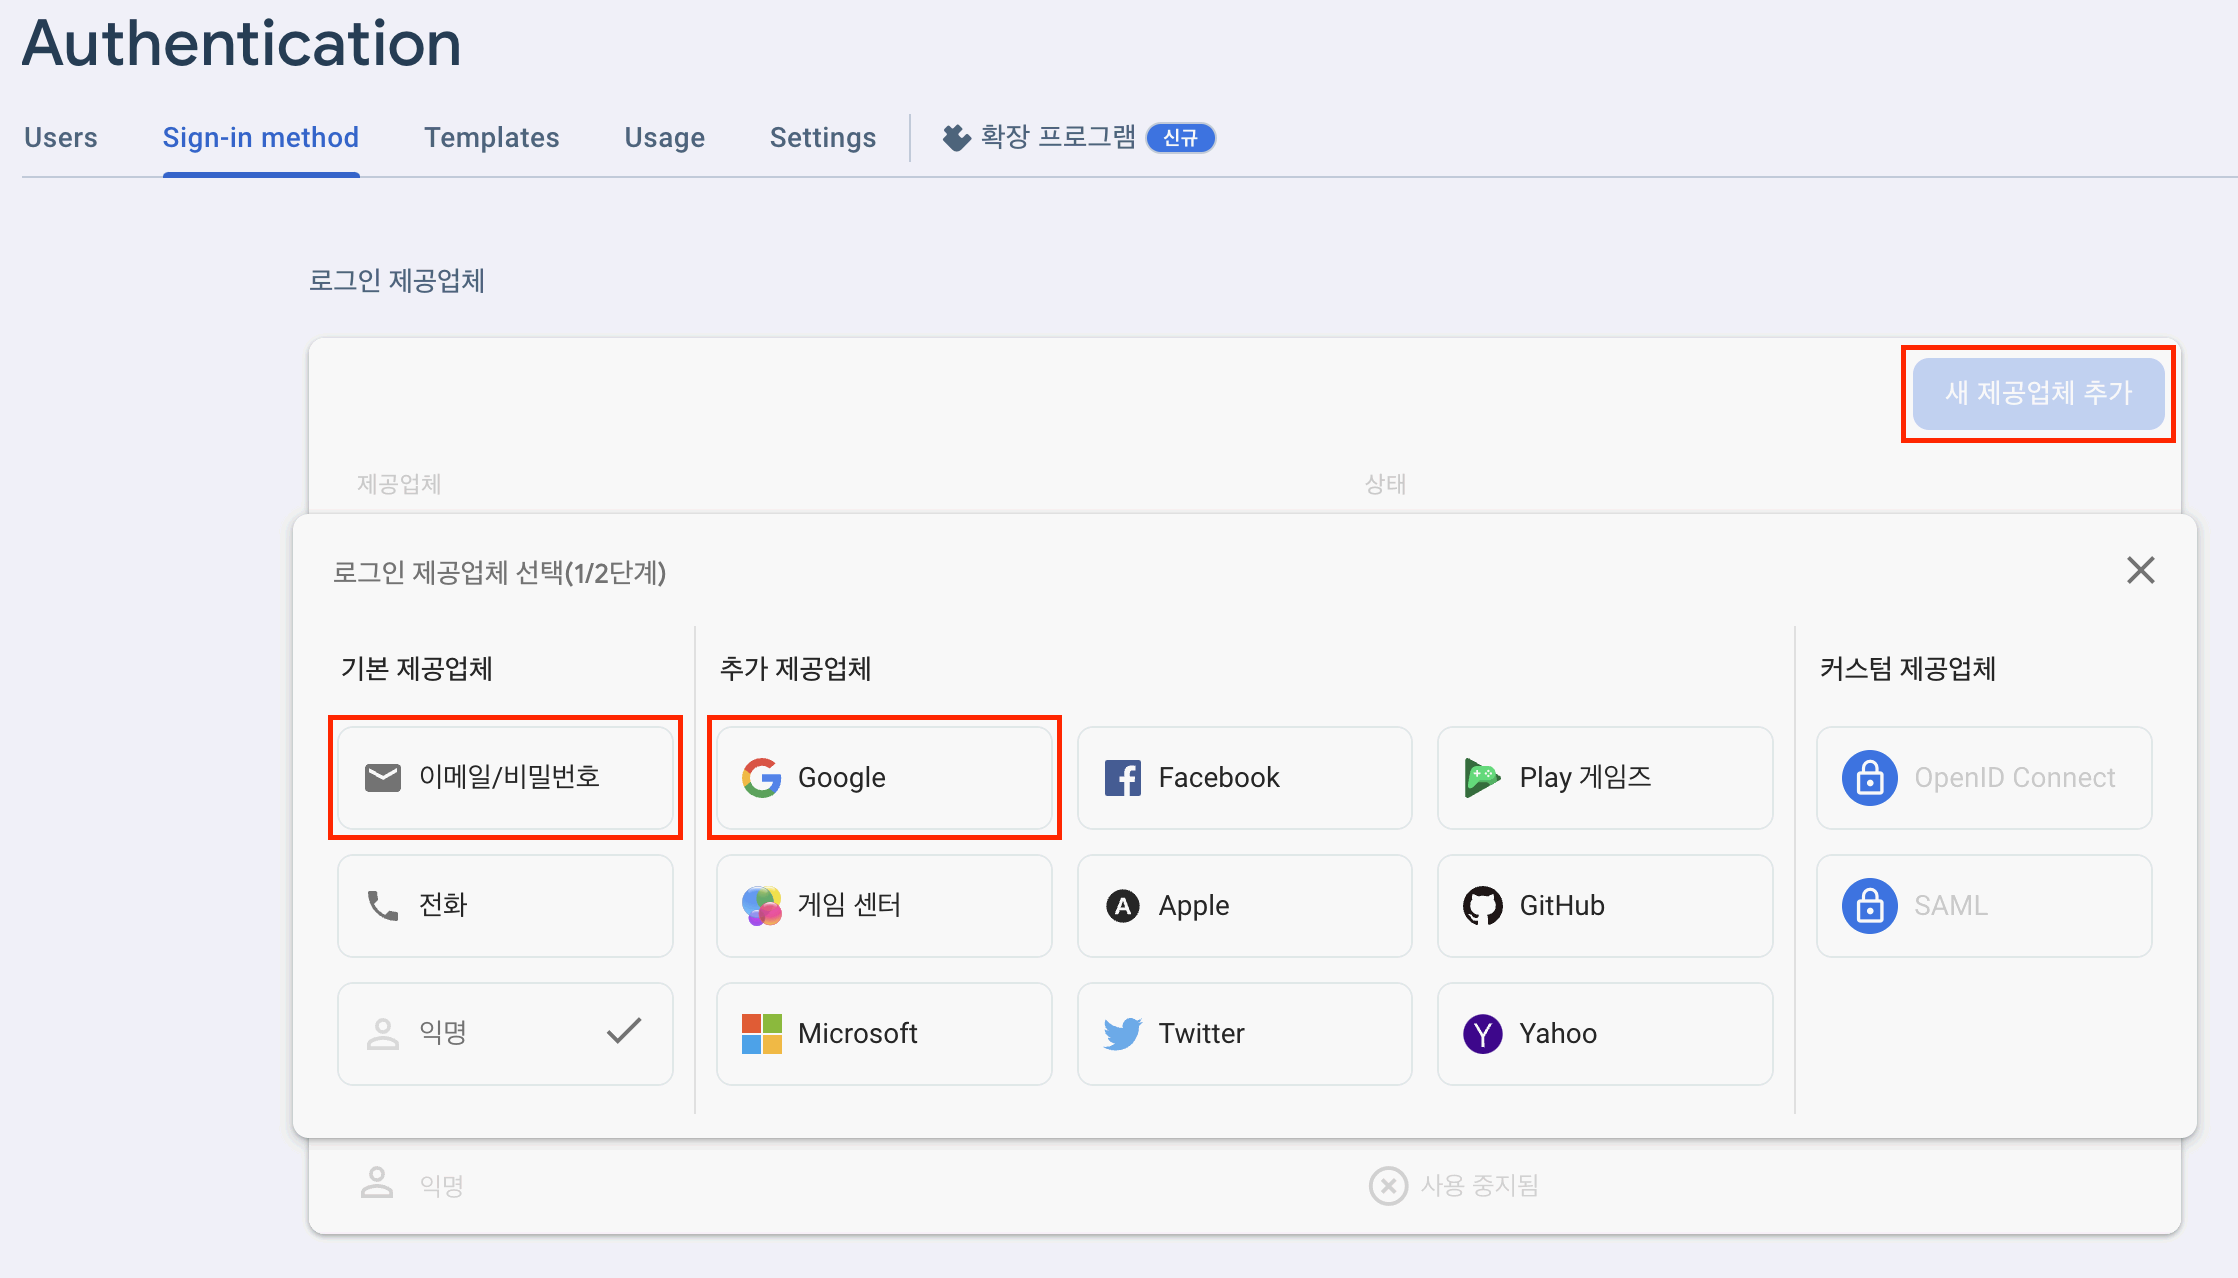
firebase project에 authentication 설정
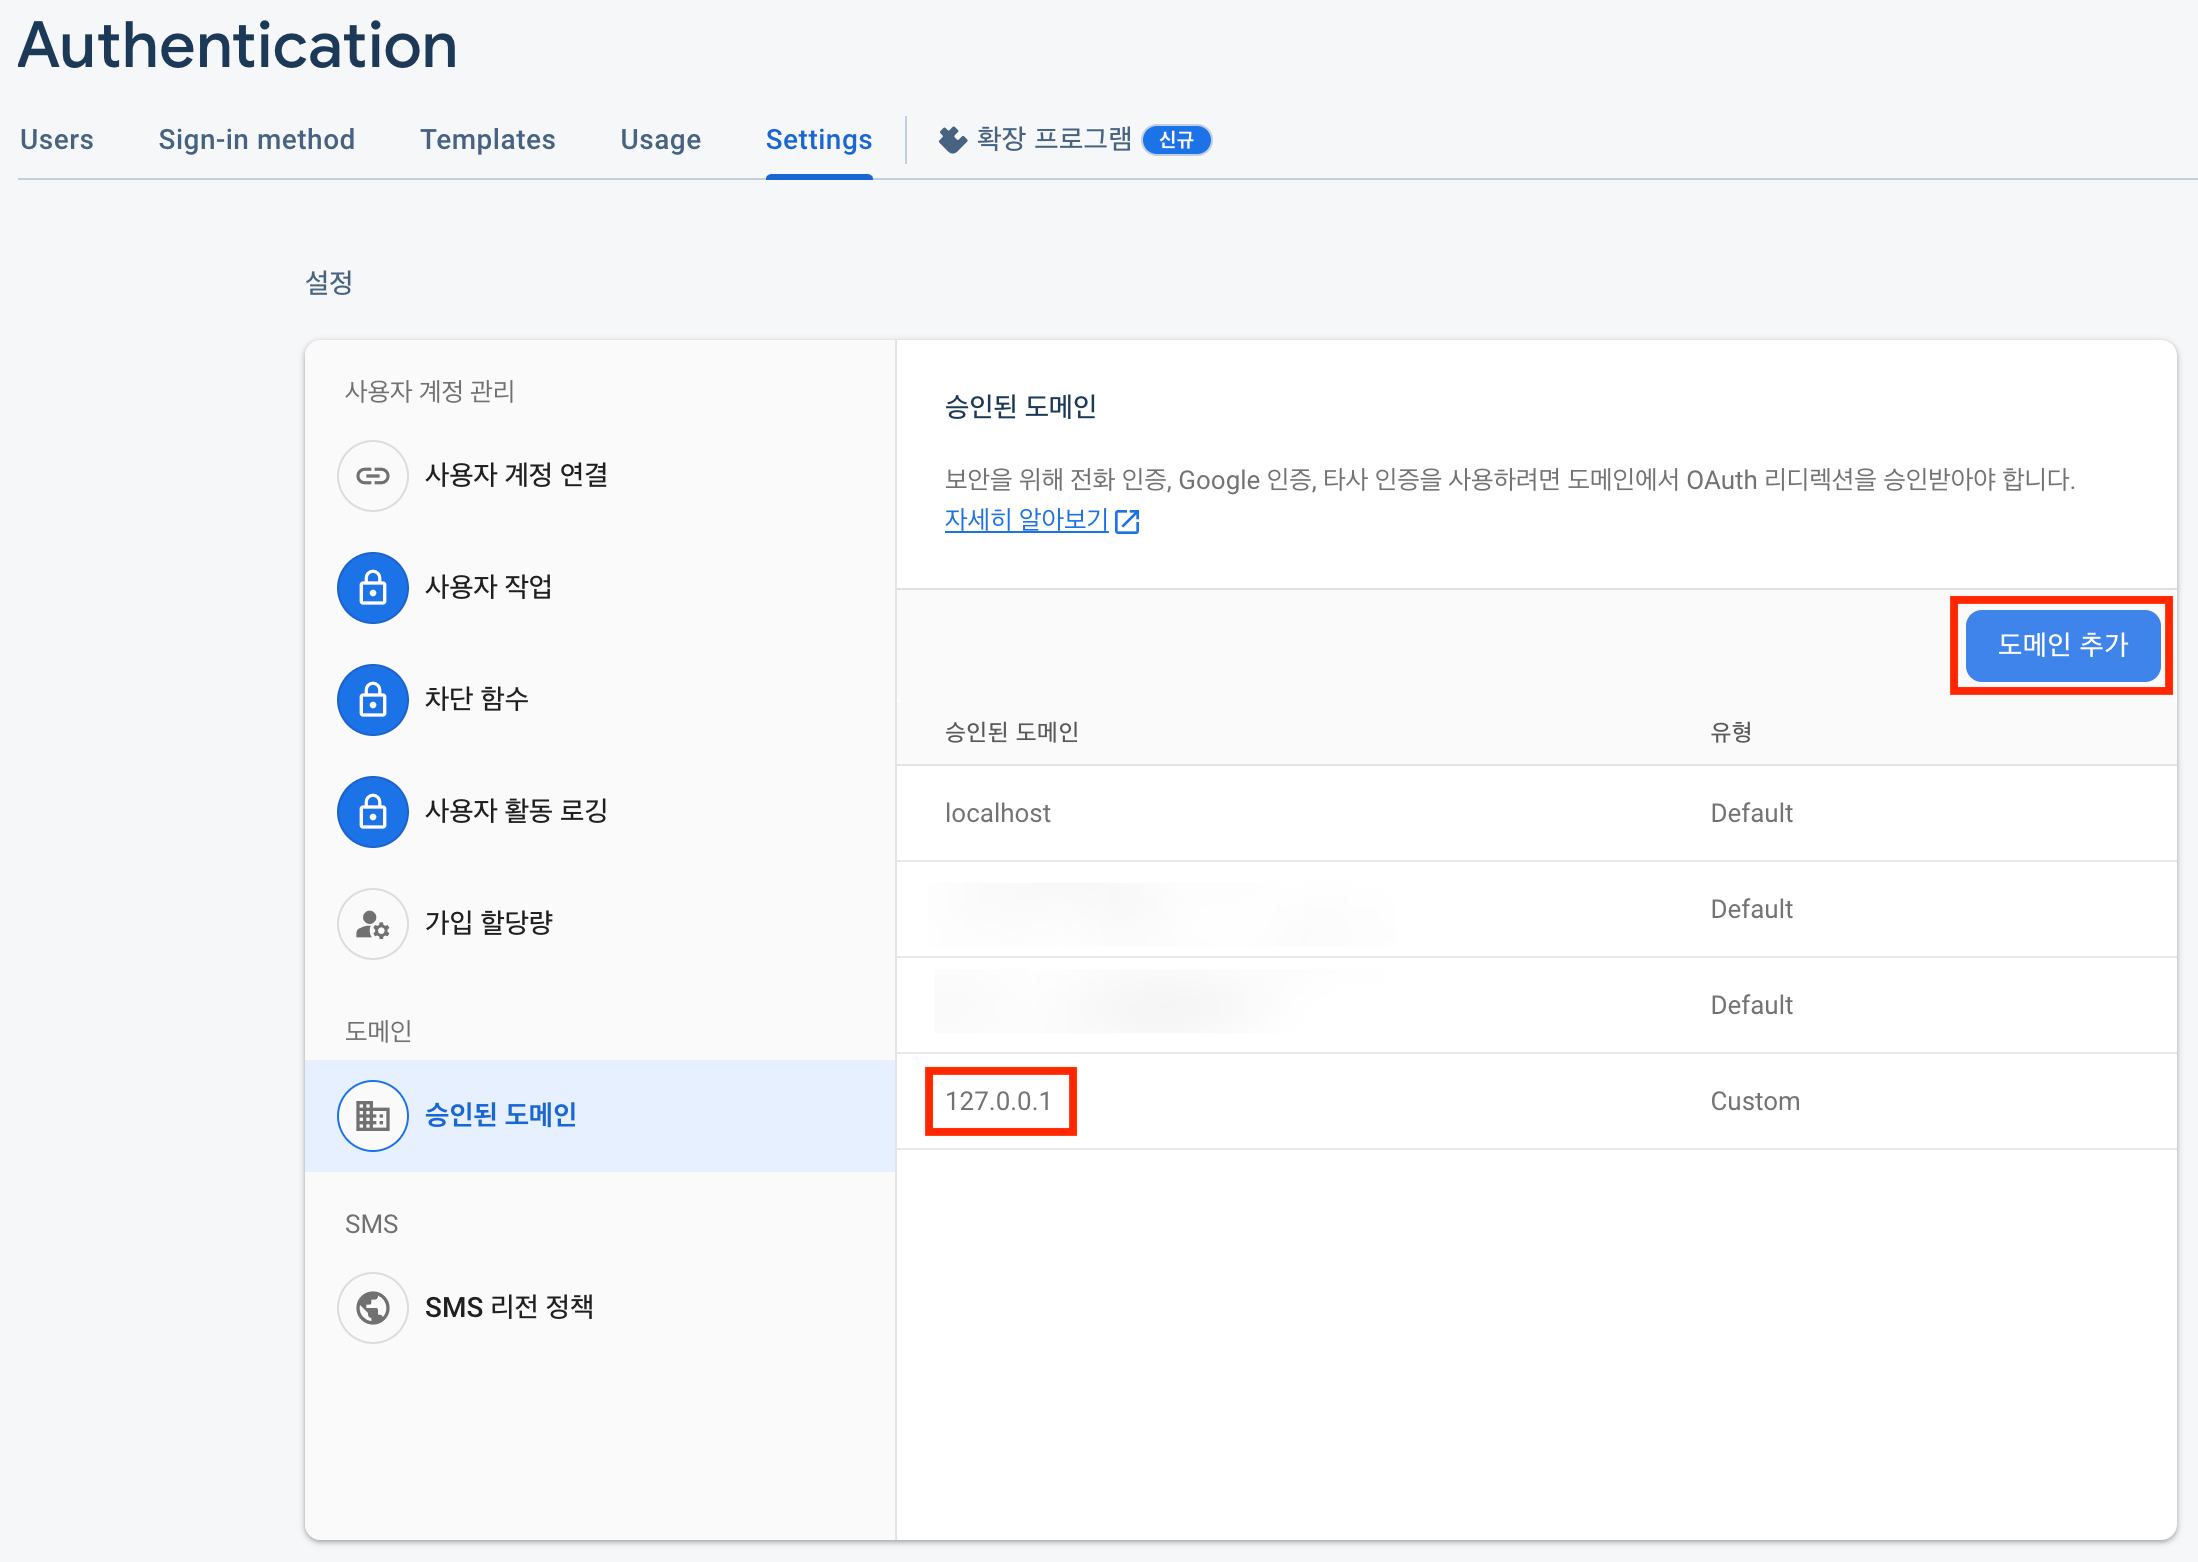
localhost 도메인 이외의 도메인에서 authentication 기능을 사용하려는 경우 설정에서 도메인을 추가하여 사용 할 수 있도록 한다
웹 어플리케이션 등록
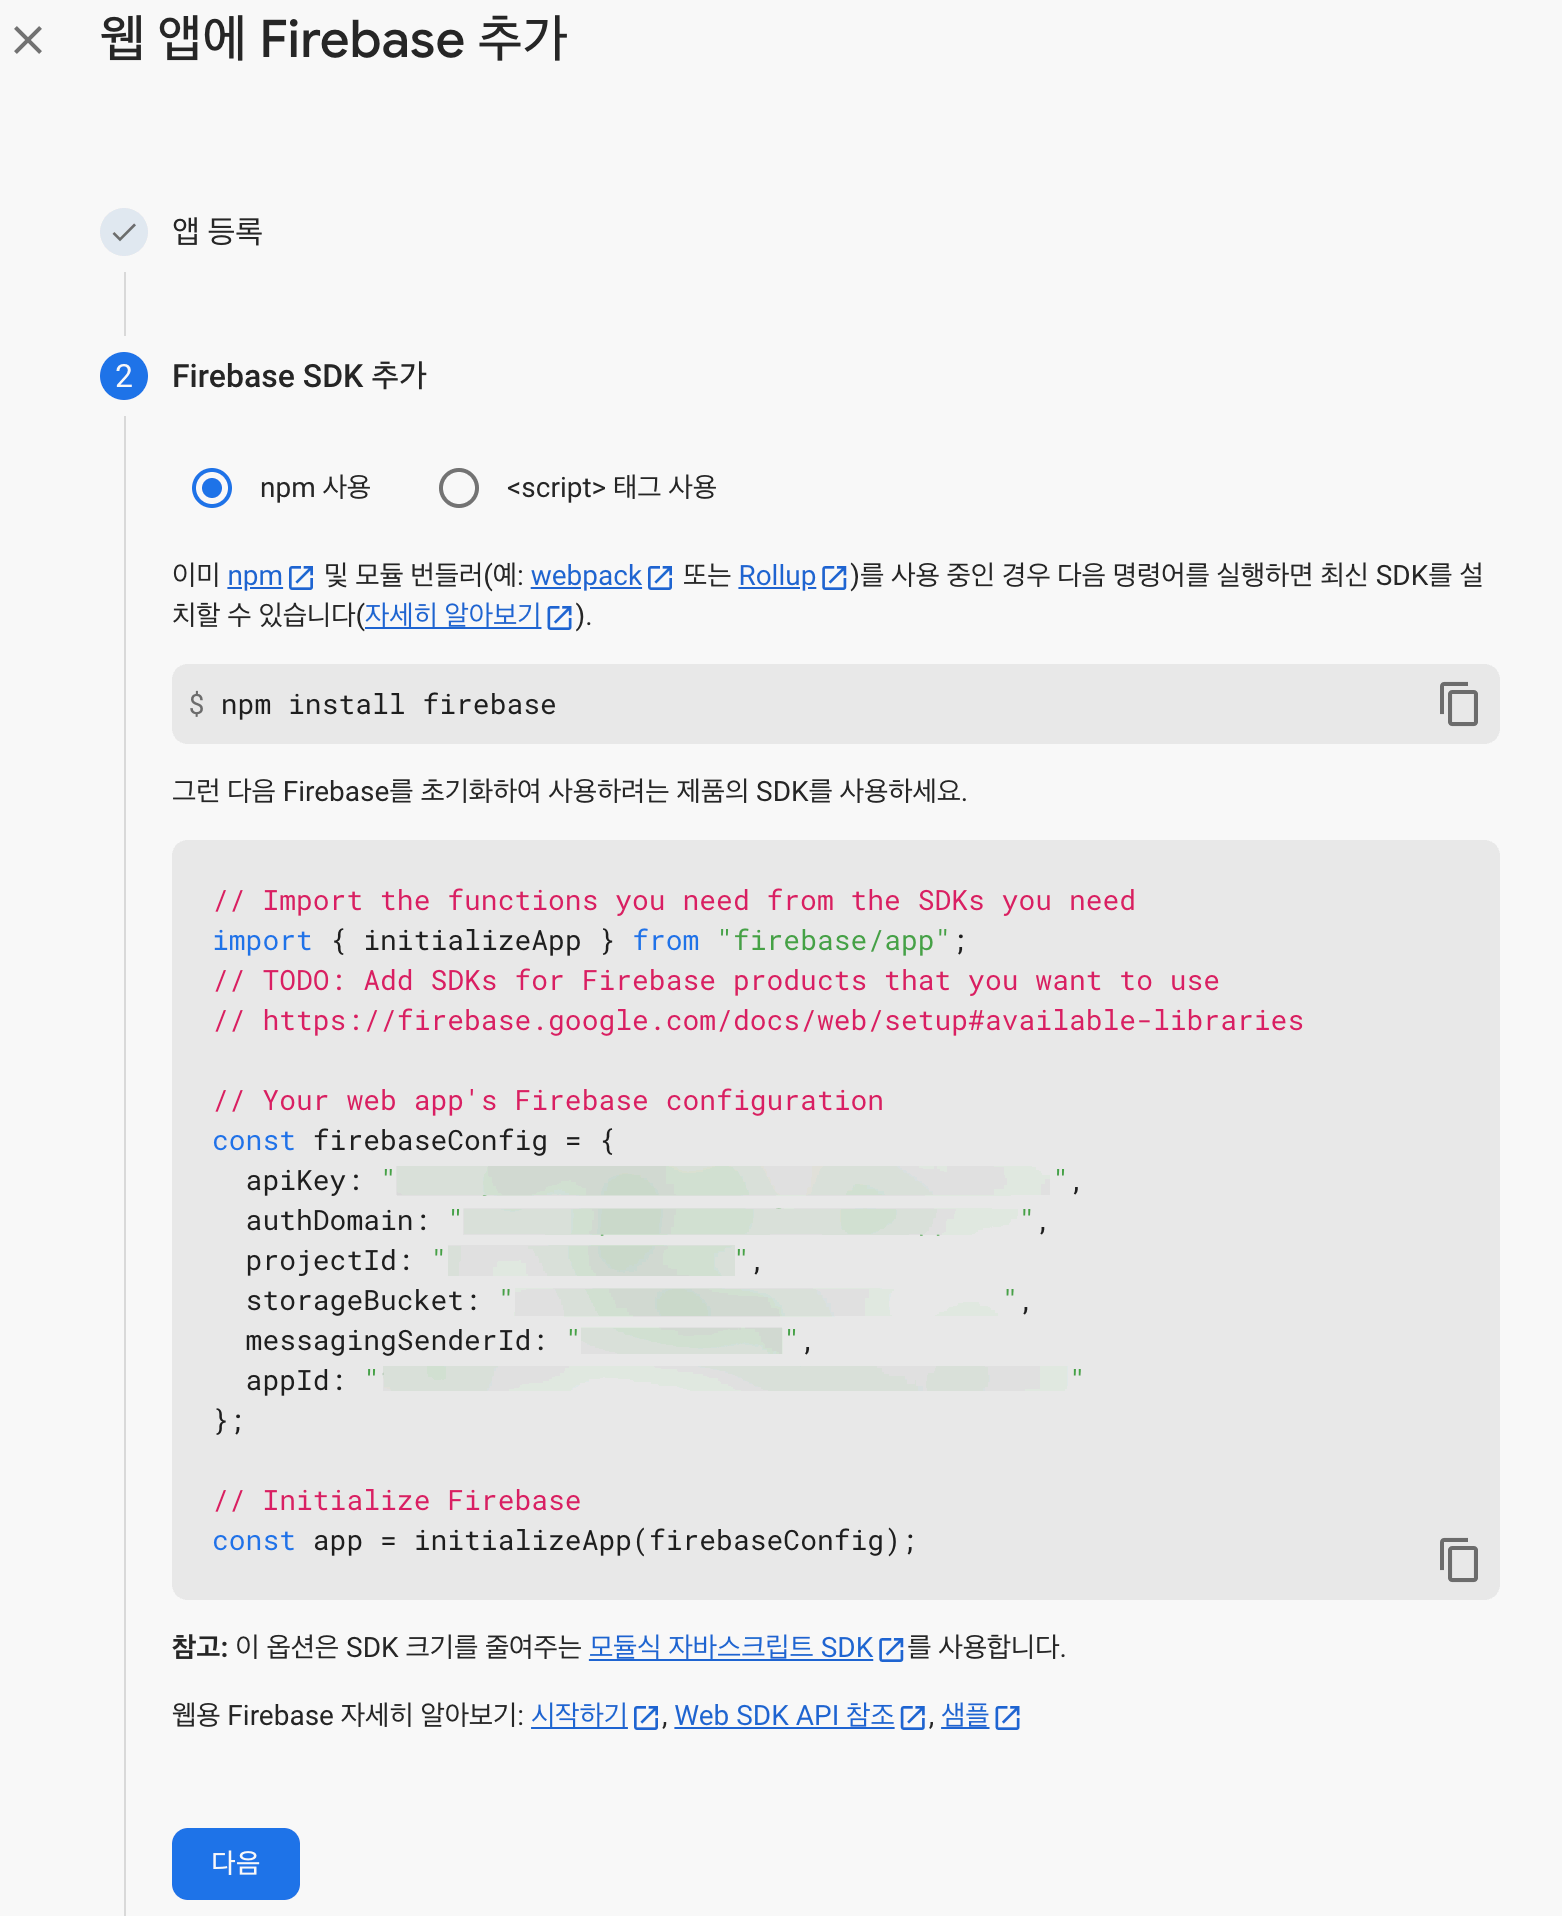
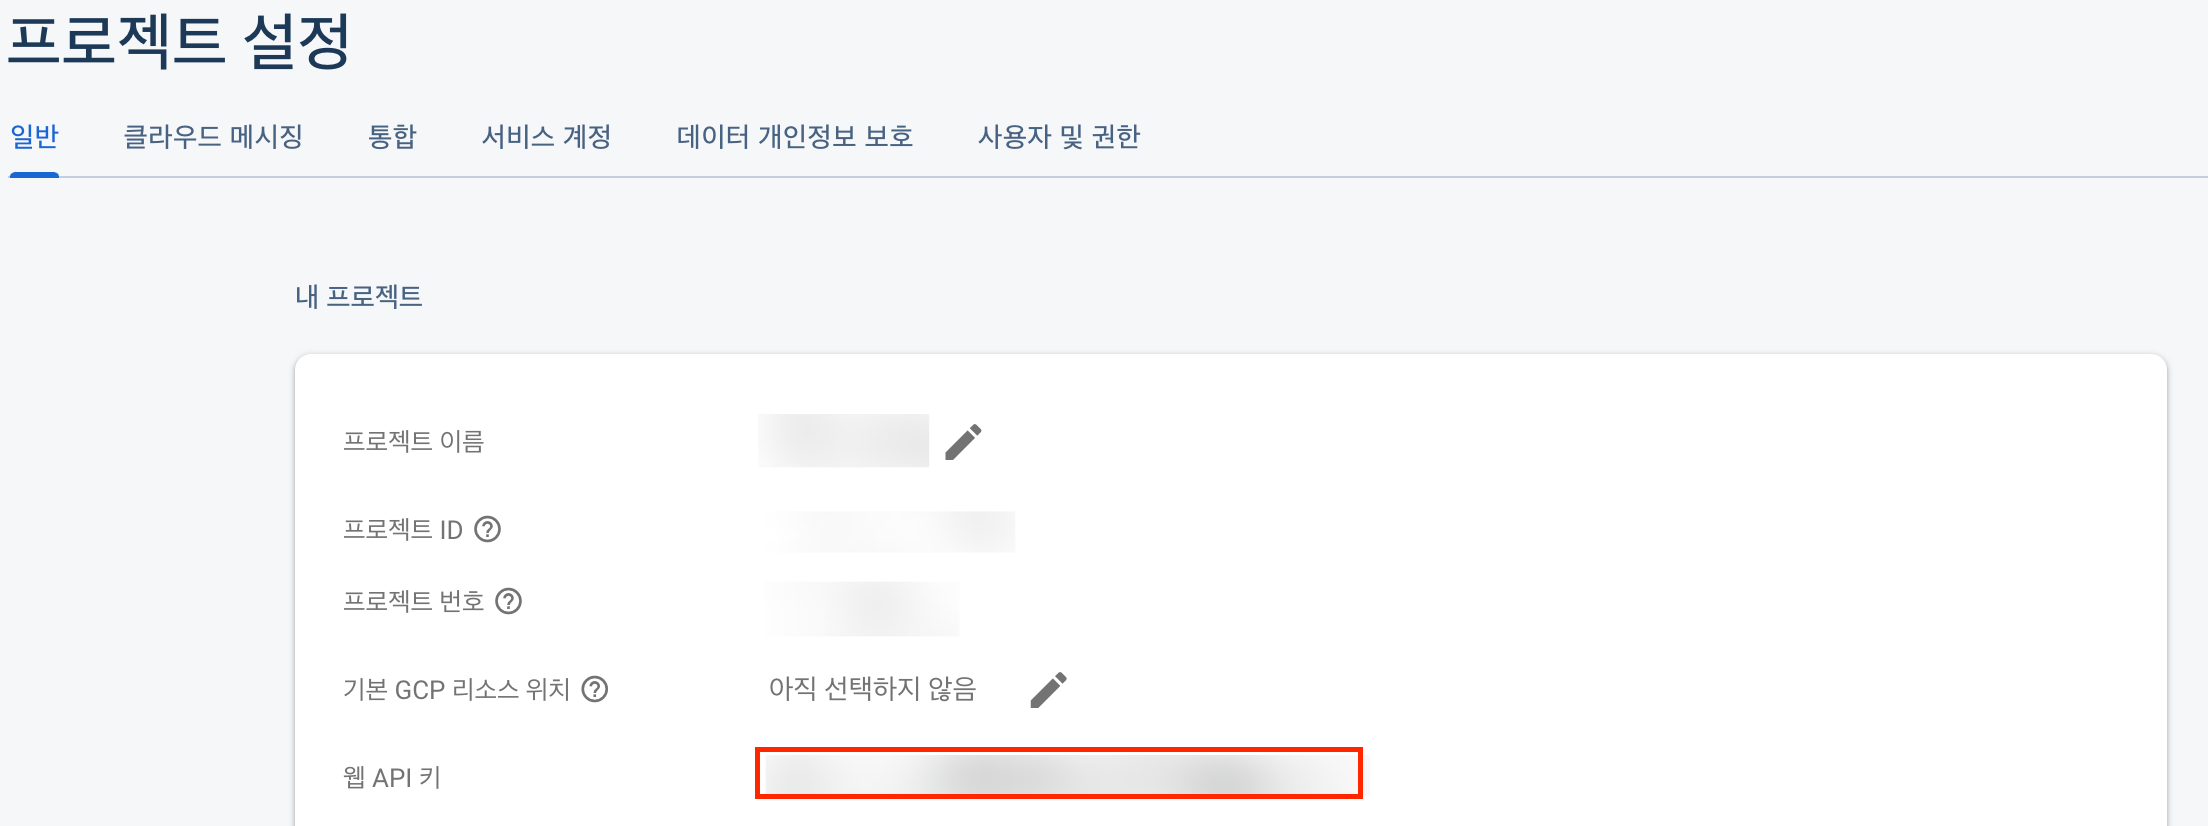
웹 앱으로 등록하면 웹 앱에서 firebase project에 접근 할 수 있는 apiKey, authDomain, projectId 등의 정보를 발급 받는다
등록된 웹 앱은 프로젝트 설정의 내 앱 항목에서 확인 가능하다
이메일/비밀번호 항목으로 token 발급
firebase 프로젝트 정보
예제 코드
웹 페이지에서 이메일과 비밀번호를 사용하여 사용자 인증에 대한 예제이다
1
2
3
4
5
6
7
8
9
10
11
12
13
14
15
16
17
18
19
20
21
22
23
24
25
26
27
28
29
30
31
32
33
34
35
36
<!-- email_password.html -->
<!DOCTYPE html>
<html>
<head>
  <meta charset="UTF-8">
  <meta name="viewport" content="width=device-width, initial-scale=1.0">
  <title>Firebase-auth</title>
</head>
<body>
  <h3>Firebase setting</h3>
  <section>
    <div>
      <label>API key</label>
      <input id="apiKey" type="text"/>
    </div>
  </section>
  <h1>Email / password</h1>
  <section>
    <form>
      <div>
        <label for="email">email</label>
        <input id="email" type="text"/>
      </div>
      <div>
        <label for="password">password</label>
        <input id="password" type="password"/>
      </div>
    </form>
    <div>
      <button id="login">login</button>
    </div>
  </section>
  <textarea name="response" id="response" cols="30" rows="10"></textarea>
  <script src="./email_password.js"></script>
</body>
</html>
1
2
3
4
5
6
7
8
9
10
11
12
13
14
15
16
17
18
19
20
21
22
23
24
25
// email_password.js
const apiKeyInput = document.getElementById('apiKey');
const userEmailInput = document.getElementById('email');
const userPasswordInput = document.getElementById('password');
const loginButton = document.getElementById('login');
const responseTextarea = document.getElementById('response');

loginButton.addEventListener('click', () => {
  const apiKey = apiKeyInput.value;
  const userEmail = userEmailInput.value;
  const userPassword = userPasswordInput.value;

  fetch('https://identitytoolkit.googleapis.com/v1/accounts:signInWithPassword?key=' + apiKey, {
    method: 'POST',
    headers: {
      'Content-Type': 'application/x-www-form-urlencoded',
    },
    body: new URLSearchParams({
      'email': userEmail,
      'password': userPassword,
      'returnSecureToken': 'true',
    }),
  }).then((response) => response.json())
  .then((data) => responseTextarea.value = JSON.stringify(data, null, 2));
});
1
2
3
4
5
6
7
8
9
10
{
  "kind": "identitytoolkit#VerifyPasswordResponse",
  "localId": "",
  "email": "",
  "displayName": "",
  "idToken": "",
  "registered": true,
  "refreshToken": "",
  "expiresIn": "3600"
}
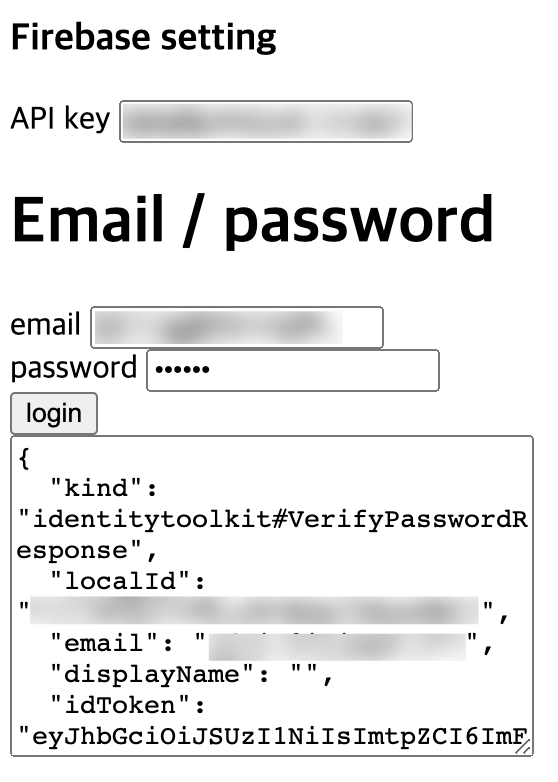
위에서 확인한 API 키를 입력하고 login 버튼을 눌러 token을 발급 받는다
Google 항목으로 token 발급
firebase 프로젝트 정보
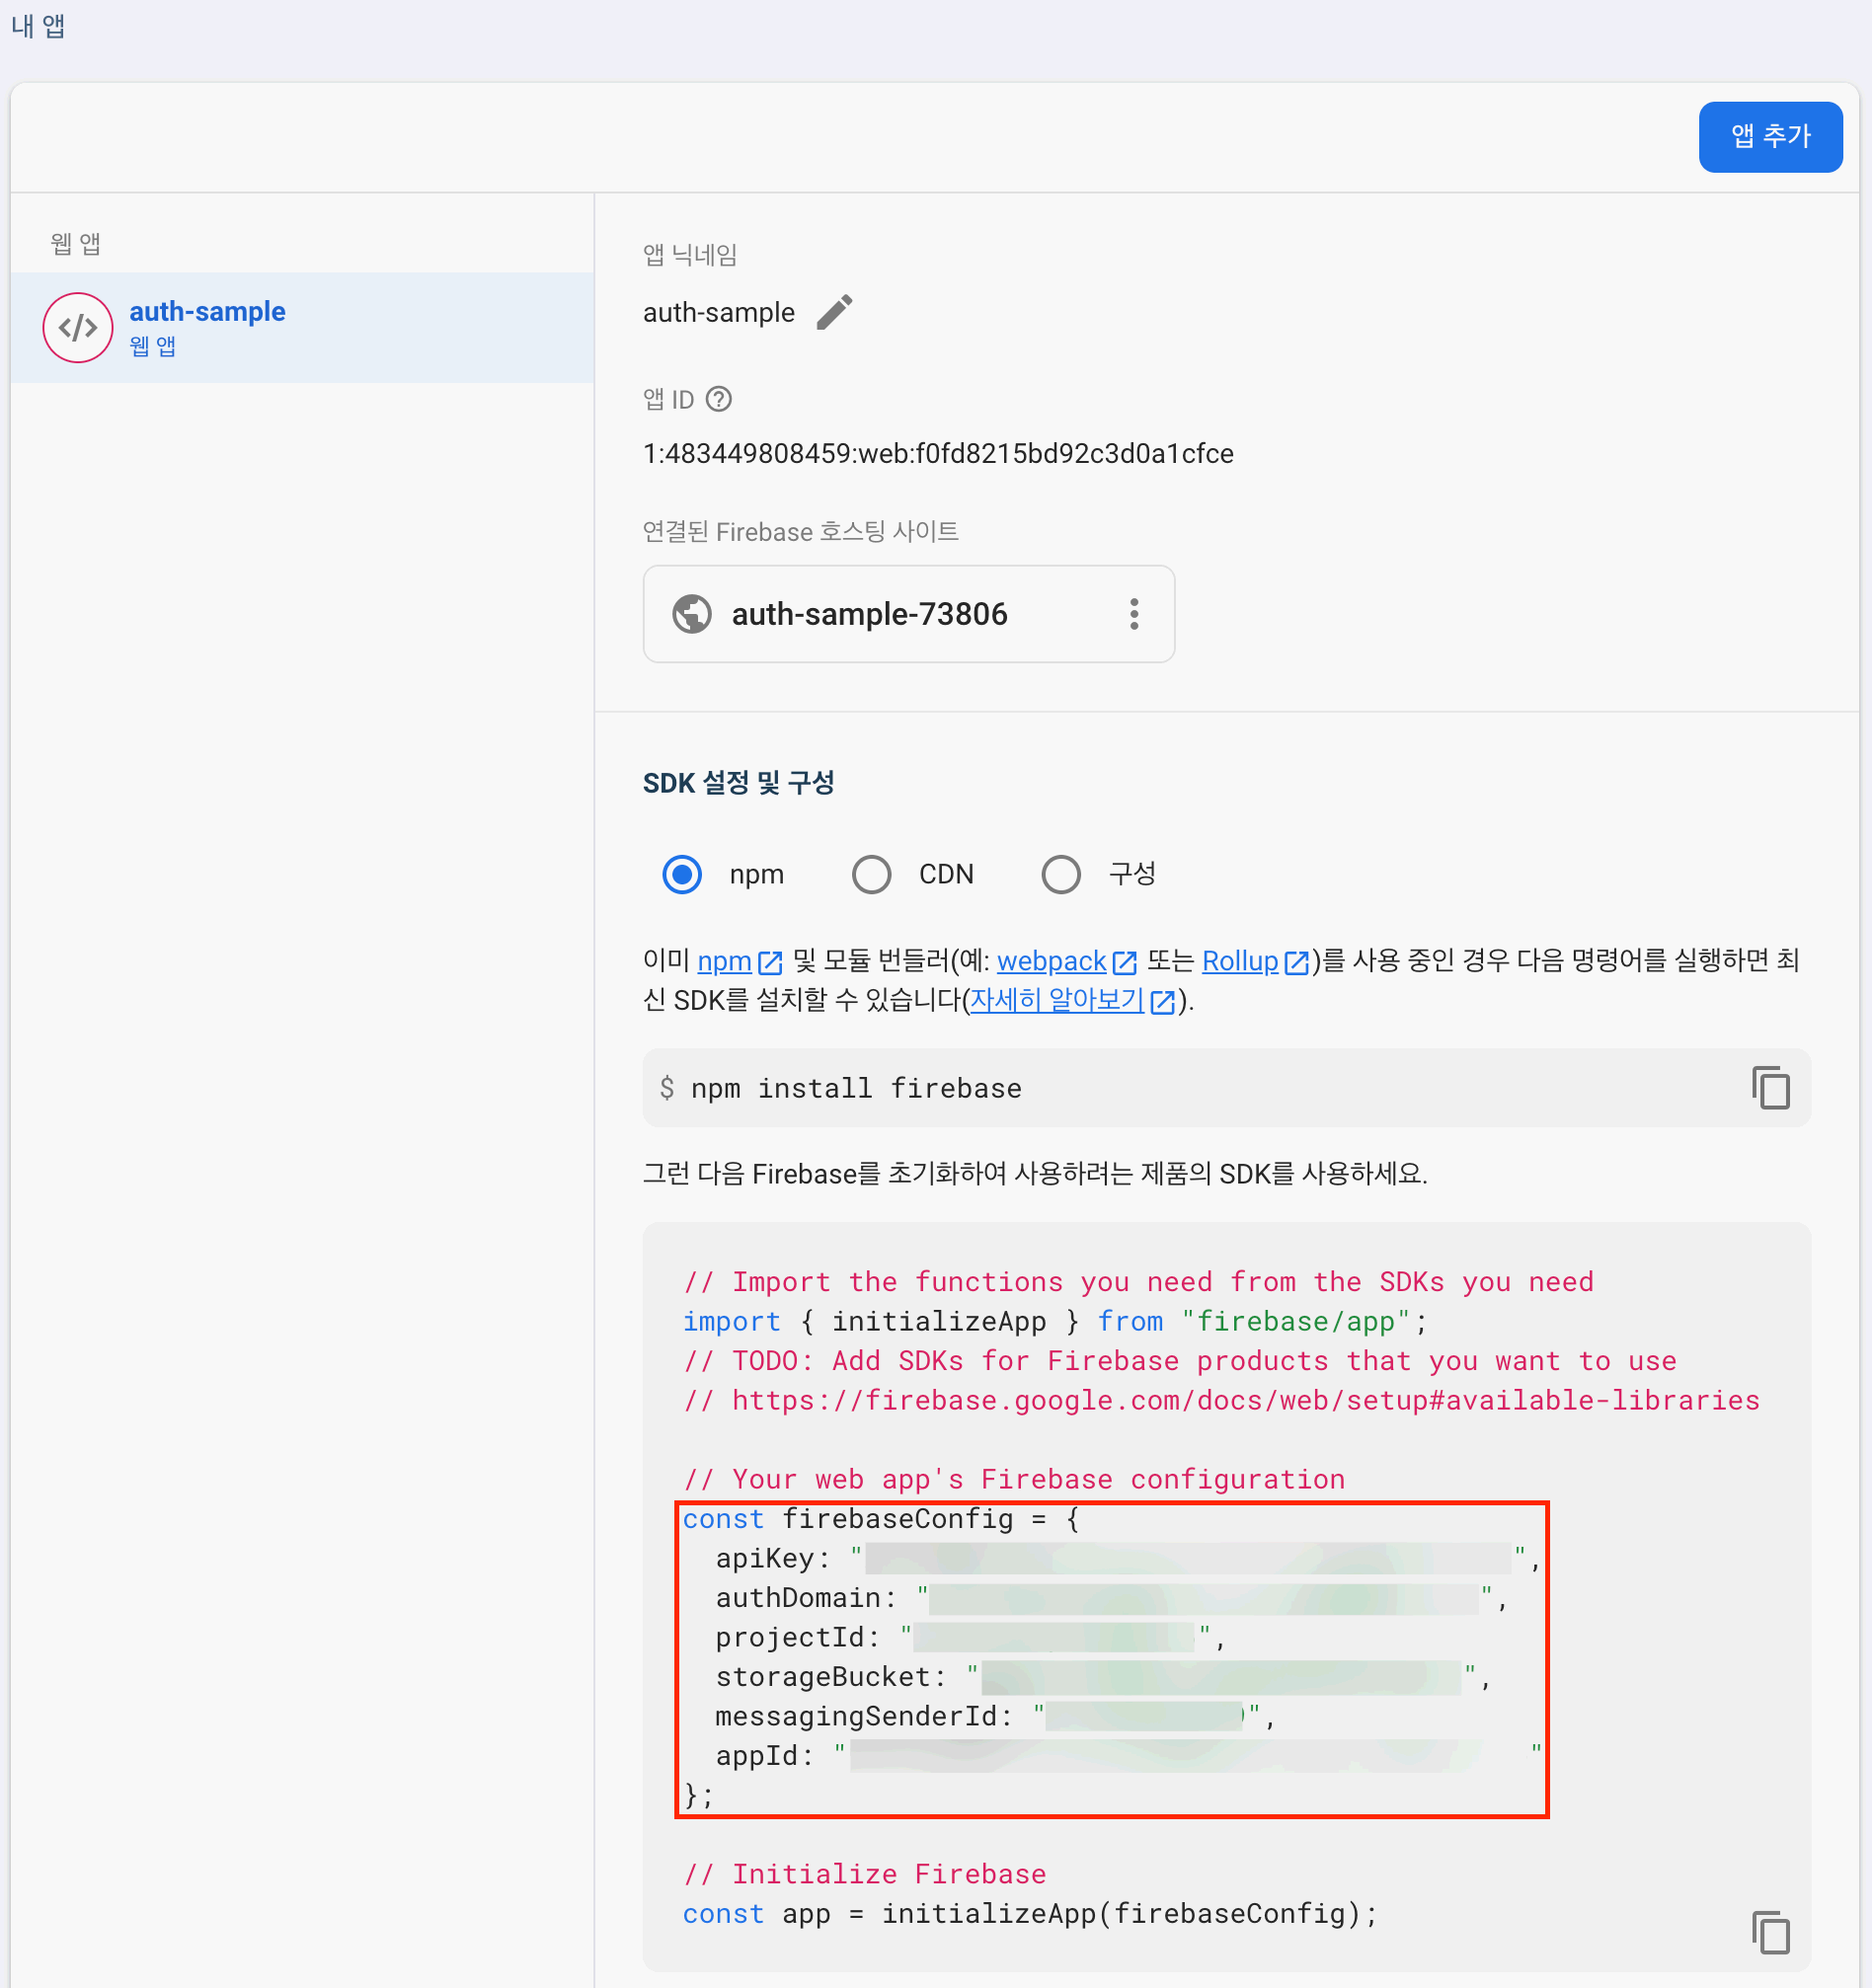
프로젝트 설정의 내 앱 영역에서 apiKey, authDomain, projectId를 확인 할 수 있다
예제 코드
웹 페이지에서 구글 로그인 사용하여 사용자 인증에 대한 예제이다
1
2
3
4
5
6
7
8
9
10
11
12
13
14
15
16
17
18
19
20
21
22
23
24
25
26
27
28
29
30
31
32
33
34
<!-- google.html -->
<!DOCTYPE html>
<html>
<head>
  <meta charset="UTF-8">
  <meta name="viewport" content="width=device-width, initial-scale=1.0">
  <title>Firebase-auth</title>
</head>
<body>
  <h3>Firebase setting</h3>
  <section>
    <div>
      <label>Project id</label>
      <input id="projectId" type="text" value=""/>
    </div>
    <div>
      <label>API key</label>
      <input id="apiKey" type="text" value=""/>
    </div>
    <div>
      <label>Auth Domain</label>
      <input id="authDomain" type="text" value=""/>
    </div>
  </section>
  <h1>Google</h1>
  <section>
    <div>
      <button id="google">google로 로그인</button>
    </div>
  </section>
  <textarea name="response" id="response" cols="30" rows="10"></textarea>
  <script type="module" src="./google.js"></script>
</body>
</html>
1
2
3
4
5
6
7
8
9
10
11
12
13
14
15
16
17
18
19
20
21
22
23
24
25
26
27
28
29
30
31
32
33
34
35
36
37
38
39
40
41
42
// google.js
import { initializeApp, } from 'https://www.gstatic.com/firebasejs/10.4.0/firebase-app.js';
import { getAuth, GoogleAuthProvider, signInWithPopup, } from 'https://www.gstatic.com/firebasejs/10.4.0/firebase-auth.js';

const projectIdInput = document.getElementById('projectId');
const apiKeyInput = document.getElementById('apiKey');
const authDomainInput = document.getElementById('authDomain');
const googleButton = document.getElementById('google');
const responseTextarea = document.getElementById('response');

googleButton.addEventListener('click', () => {
  const projectId = projectIdInput.value;
  const apiKey = apiKeyInput.value;
  const authDomain = authDomainInput.value;

  const firebaseApp = initializeApp({
    projectId: projectId,
    apiKey: apiKey,
    authDomain: authDomain,
  });

  const auth = getAuth(firebaseApp);

  const googleAuthProvider = new GoogleAuthProvider();
  googleAuthProvider.setDefaultLanguage('ko');
  googleAuthProvider.setCustomParameters({
    login_hint: 'user@example.com',
  });

  signInWithPopup(auth, googleAuthProvider)
    .then((userCredential) => {
      responseTextarea.value = JSON.stringify(userCredential, null, 2);

      userCredential.user.getIdToken()
        .then((idToken) => {
          console.log(idToken);

          const refreshToken = userCredential.user.refreshToken;
          console.log(refreshToken);
        });
    });
});
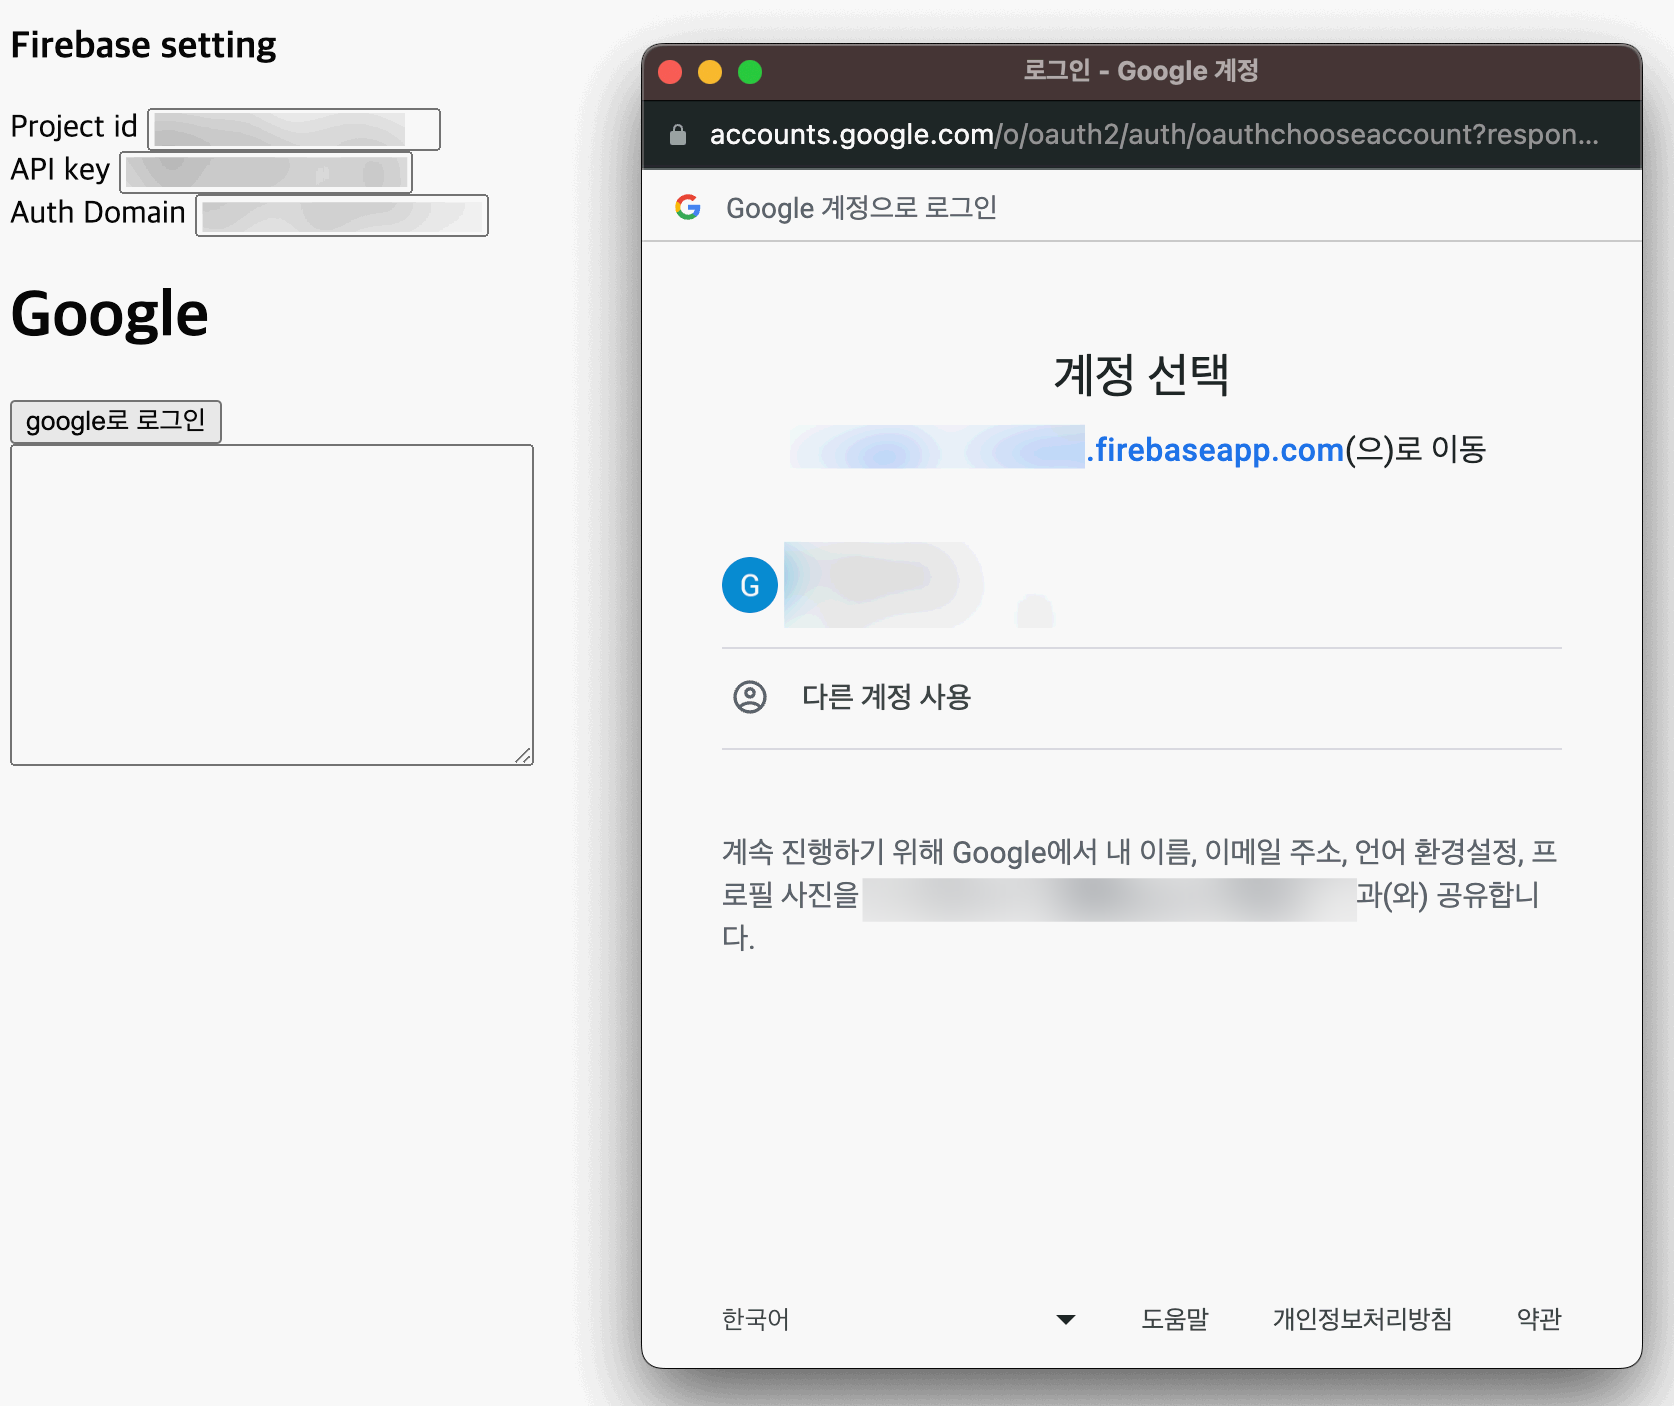
google로 로그인 버튼을 눌러서 구글 로그인을 진행 한다
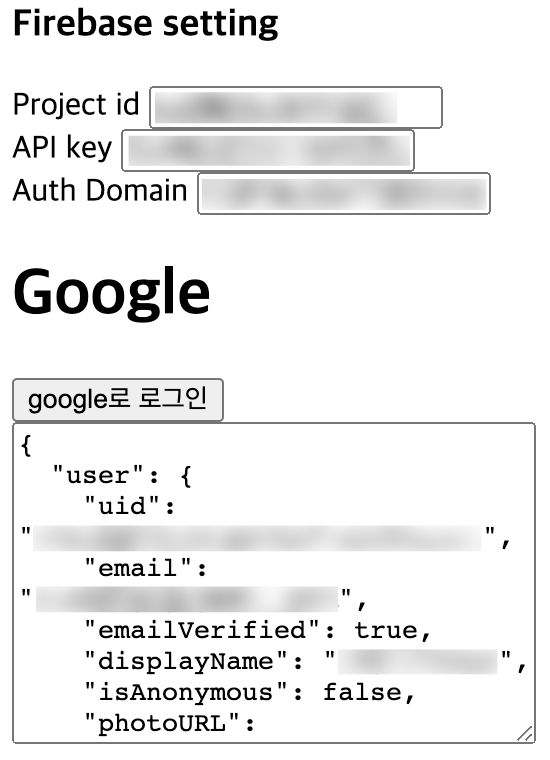
인증 결과 객체에서 idToken과 refreshToken을 확인 할 수 있다
Spring boot 서버에서 인증 정보 확인
예제에 사용된 전체 소스 코드는 하단의 Repository 링크를 참고하면 된다
firebase 프로젝트 정보
1
2
3
4
5
6
7
8
9
10
11
12
13
{
  "type": "service_account",
  "project_id": "",
  "private_key_id": "",
  "private_key": "-----BEGIN PRIVATE KEY-----\n...\n-----END PRIVATE KEY-----\n",
  "client_email": "",
  "client_id": "",
  "auth_uri": "https://accounts.google.com/o/oauth2/auth",
  "token_uri": "https://oauth2.googleapis.com/token",
  "auth_provider_x509_cert_url": "https://www.googleapis.com/oauth2/v1/certs",
  "client_x509_cert_url": "",
  "universe_domain": "googleapis.com"
}
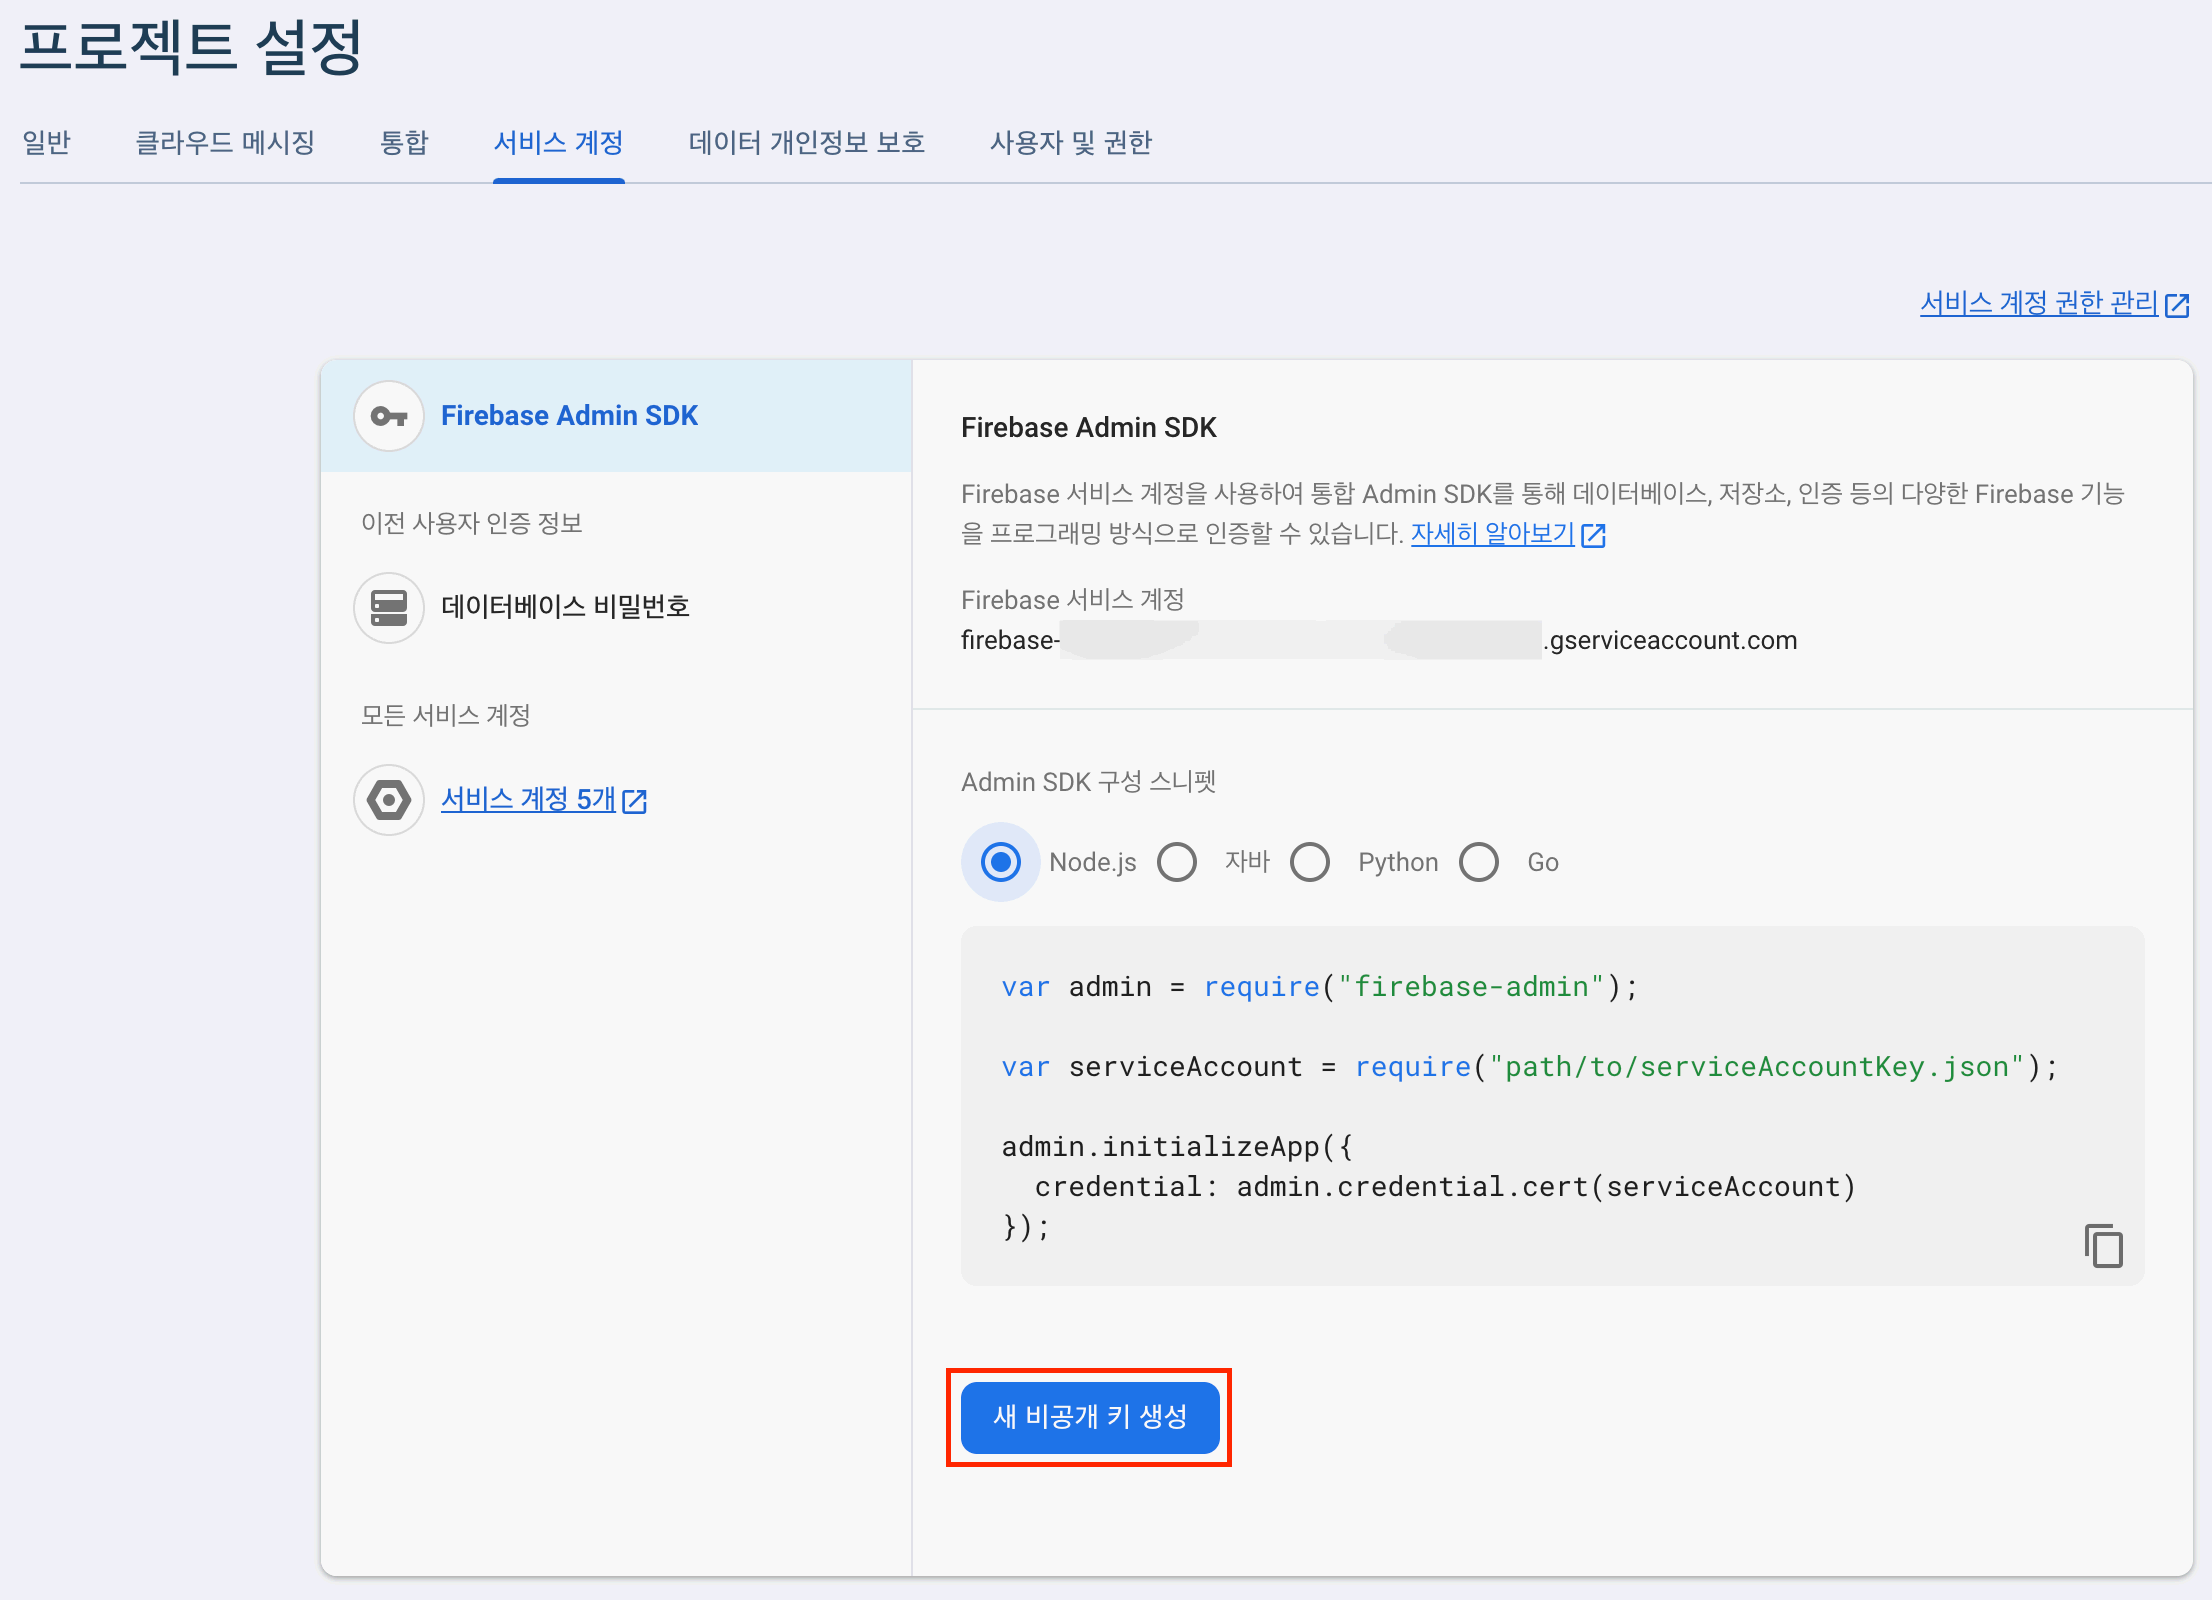
프로젝트 설정의 서비스 계정 탭에서 비공개 키를 생성한다
예제 코드
외부에서 전달 받은 idToken 정보로 firebase에 계정 정보 조회를 하는 예제이다
1
2
3
4
5
6
7
8
9
10
11
12
13
14
15
16
17
18
19
20
21
22
23
24
25
26
27
28
29
30
plugins {
    id 'java'
    id 'org.springframework.boot' version '3.1.4'
    id 'io.spring.dependency-management' version '1.1.3'
}

group = 'com.sample.firebase'
version = '0.0.1-SNAPSHOT'

java {
    sourceCompatibility = '17'
}

repositories {
    mavenCentral()
}

dependencies {
    implementation 'org.springframework.boot:spring-boot-starter-web'
    developmentOnly 'org.springframework.boot:spring-boot-devtools'
    testImplementation 'org.springframework.boot:spring-boot-starter-test'

    implementation 'com.google.firebase:firebase-admin:9.1.1' // firebase
    compileOnly 'org.projectlombok:lombok' // lombok
    annotationProcessor 'org.projectlombok:lombok' // lombok
}

tasks.named('test') {
    useJUnitPlatform()
}
spring boot의 기본적인 종속 이외에 firebase와 코드 편의를 위해서 lombok을 추가한다
위에서 다운 받은 비공개 키를 /src/resources/firebase-adminsdk.json 경로로 추가한다
1
2
3
4
5
6
7
8
9
10
11
12
13
14
15
16
17
18
19
20
21
22
23
24
25
26
27
28
29
30
31
32
33
34
35
36
37
38
39
40
41
42
43
44
45
46
47
48
49
50
51
52
53
54
55
56
57
58
59
60
61
62
package com.sample.firebase.auth.controller;

import com.google.auth.oauth2.GoogleCredentials;
import com.google.firebase.FirebaseApp;
import com.google.firebase.FirebaseOptions;
import com.google.firebase.auth.FirebaseAuth;
import com.google.firebase.auth.FirebaseToken;
import com.sample.firebase.auth.data.request.TokenInfo;
import com.sample.firebase.auth.data.response.AccountInfo;
import lombok.extern.slf4j.Slf4j;
import org.springframework.core.io.ClassPathResource;
import org.springframework.http.ResponseEntity;
import org.springframework.web.bind.annotation.RequestBody;
import org.springframework.web.bind.annotation.RequestMapping;
import org.springframework.web.bind.annotation.RequestMethod;
import org.springframework.web.bind.annotation.RestController;

import java.io.InputStream;

@Slf4j
@RestController
public class AuthController {

    private final FirebaseApp firebaseApp;
    private final FirebaseAuth firebaseAuth;

    public AuthController() {
        ClassPathResource resource = new ClassPathResource("firebase-adminsdk.json");

        GoogleCredentials googleCredentials = null;
        try {
            InputStream resourceInputStream = resource.getInputStream();
            googleCredentials = GoogleCredentials.fromStream(resourceInputStream);
        } catch (Exception exception) {
            throw new RuntimeException("Invalid firebase-adminsdk.json");
        }

        FirebaseOptions options = FirebaseOptions.builder()
                .setCredentials(googleCredentials)
                .build();

        this.firebaseApp = FirebaseApp.initializeApp(options);
        this.firebaseAuth = FirebaseAuth.getInstance(firebaseApp);
    }

    @RequestMapping(path = "/auth", method = RequestMethod.POST)
    public ResponseEntity<AccountInfo> getAccountInfo(@RequestBody TokenInfo tokenInfo) throws Exception {
        FirebaseToken firebaseToken = this.firebaseAuth.verifyIdToken(tokenInfo.getIdToken());

        log.info("user id: {}", firebaseToken.getUid());
        log.info("email: {}", firebaseToken.getEmail());
        log.info("email verified: {}", firebaseToken.isEmailVerified());

        AccountInfo accountInfo = AccountInfo.builder()
                .userId(firebaseToken.getUid())
                .email(firebaseToken.getEmail())
                .isEmailVerified(firebaseToken.isEmailVerified())
                .build();

        return ResponseEntity.status(200).body(accountInfo);
    }
}
간단하게 idToken으로 계정 정보를 조회하여 반환하는 controller이다
1
2
3
4
5
curl --location 'http://localhost:8080/auth' \
--header 'Content-Type: application/json' \
--data '{
    "idToken": ""
}'
request body에 idToken을 담아 호출한다
1
2
3
4
5
{
    "userId": "",
    "email": "",
    "isEmailVerified": true
}
firebase에서 사용하는 user id와 email 그리고 해당 이메일에 대한 인증 여부를 반환 받을 수 있다
일반적으로는 REST 호출시 header에 Authorization 항목에 token을 담아 호출하여 인증 처리를 하게 되고, 각각의 REST에 대한 controller에서 token에 대한 인증 처리를 하거나 interceptor를 구현하여 기본적인 인증은 interceptor에서 처리하여 각각의 controller에서는 해당 기능에 집중 할 수 있도록 처리 하는 방법도 추천한다
